

Notiger - Get realtime notifications on events from your application
My submission for the Netlify x Hashnode Hackathon

Search for a command to run...
My submission for the Netlify x Hashnode Hackathon
This is so good that I can't wrap my head around it 🤯! I mean the way you built it!!!!
If you have worked with the Solana Wallet Adapter before, you will know that it is very easy to set up a Connect Wallet button with a decent modal. However, customization is pretty limited. We can only add some custom CSS hence changing the styles bu...
And CandyPay QR Codes which people can scan to claim the NFT in under 15 seconds

As developers, most of us use the terminal to interact with our computers for many tasks as we find it more productive. We are familiar with commands like ls, cd, cat, grep, and find. These are primarily pre-installed on our computers and mostly get ...

Most of us use version control systems (mostly git) for our projects but the git CLI is unproductive. We often need to run multiple commands and got to type more characters. Well, what if I told you there are tools that can improve this significantl...
Authentication in Web3 is extremely easy but supporting all the wallets and making a nice UI can be painful and time-consuming. Thankfully, there are many libraries which makes this extremely easy as well. Today we are going to be looking at adding R...

This month started with Hashnode announcing another hackathon, this time in partnership with Netlify, an amazing platform to host websites and serverless functions. This got me thinking and this time an idea came to my mind quite early on in the month. However, there were school exams so I did most of the work in the last 8 days 😕
Notiger is a tool for developers that allows one to fire events from their applications. These events are stored in a database and can be accessed at any time. Also, if one enables notifications, they will get a notification whenever a new event is fired.
My portfolio site has got a huge role to play in this idea. I have a contact form through which one can send me messages. Now, storing the messages in a database makes sense but it would be better to have an easier way to view these messages and also get notified when they are sent.
I also figured that many people would like such a solution as not everyone has the time to implement the logic for saving form responses and events to a database. It has many other use cases, I will get to them in a later part in this blog post.
Notiger has got to do everything from authentication to data storage to sending out push notifications. Here is the tech stack it uses -
and of course...
After creating a notiger account, you create a project. Each project can have streams that will receive the events. When an event is received, it is stored in a database, MongoDB in this case and a notification is pushed to all devices with notifications enabled that the user has.
An example event -
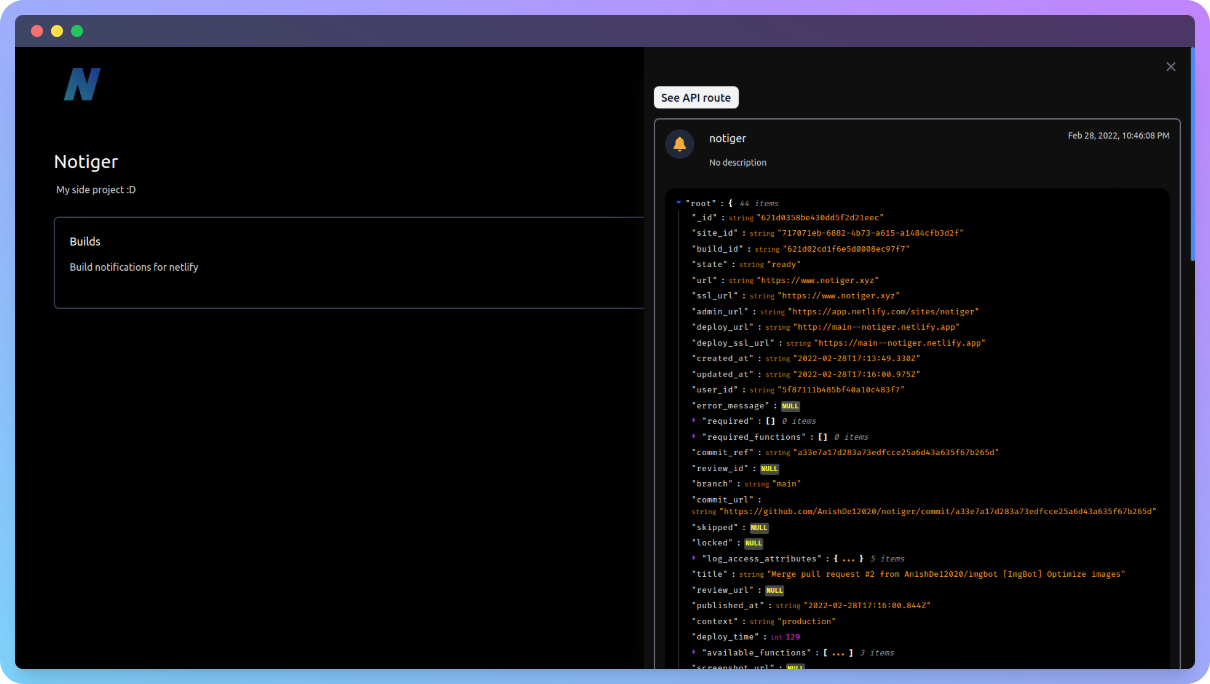
As you can see, this event is actually from Netlify. Netlify has this amazing feature that allows us to set up webhook notifications for specific events within Netlify. You can learn more about it here. There are many other applications (like GitHub) that allow us to set up webhook notifications for some events. Notiger can receive these webhooks, store the payload (which usually contains important data regarding the event) in a database, and send out a notification whenever the webhook is fired.
NextAuth is a JS SDK that allows us to add authentication to our NextJS applications easily. Firstly, we need to set up an API route that will handle all the authentication. Thankfully, NextAuth makes it really easy by providing us with some boilerplate code, and also, we need to only add about 1 file for this. Here is my code -
pages/api/auth/[...nextauth].ts -
import NextAuth from "next-auth";
import GoogleProvider from "next-auth/providers/google";
import { MongoDBAdapter } from "@next-auth/mongodb-adapter";
import clientPromise from "../../../lib/mongodb-nextauth";

export default NextAuth({
  adapter: MongoDBAdapter(clientPromise),
  providers: [
    GoogleProvider({
      clientId: process.env.GOOGLE_CLIENT_ID,
      clientSecret: process.env.GOOGLE_CLIENT_SECRET,
    }),
  ],
  callbacks: {
    async session({ session, token, user }) {
      session.token = token;
      return session;
    },
    async jwt({ token, user }) {
      if (user) {
        token.user = user;
      }
      return token;
    },
  },
  session: {
    strategy: "jwt",
  },
  pages: {
    signIn: "/auth",
    signOut: "/auth",
  },
});
Now, here, I have added social authentication with Google (in just 4 lines of code!) and customized the session and the jwt callbacks. Also, I am storing user data in a database, MongoDB in this case. The JWT callback creates a JWT with the user data object, which is used in other parts of the application. The session callback is customized to include the JWT token when the current session is retrieved. I have also implemented a custom page for authentication, /auth.
Now, I don't want my users to be greeted with errors by visiting something like the dashboard page when they are not logged in. Thankfully, NextAuth lets us secure pages with just 1 line of code using NextJS Middleware. For example, this is how the dashboard page is secured -
export { default } from "next-auth/middleware";
Yes, that is it!!!
If one is not logged in they, are redirected to the /auth page and once they have logged in, they are redirected to the dashboard page (or any other page from where they were redirected to /auth).
Now, I could have used server-side rendering on my pages to secure them as well, but it requires more code and is also slower and more resource-intensive. Netlify is also one of those hosting providers which support middleware with zero additional configuration which makes using middleware make more sense.
This was one of the most challenging things to implement. Here is why -
First of all, I added a service worker that would receive the message in the background (that is, when the application is out of focus or closed) and fire a push notification -
firebase-messaging-sw.js -
importScripts("https://www.gstatic.com/firebasejs/9.6.7/firebase-app-compat.js")
importScripts("https://www.gstatic.com/firebasejs/9.6.7/firebase-messaging-compat.js")

const firebaseConfig = {
  apiKey: # Retrieve from the Firebase Console,
  authDomain: # Retrieve from the Firebase Console,
  projectId: # Retrieve from the Firebase Console,
  storageBucket: # Retrieve from the Firebase Console,
  messagingSenderId: # Retrieve from the Firebase Console,
  appId: # Retrieve from the Firebase Console
};

const app = firebase.initializeApp(firebaseConfig);
const messaging = firebase.messaging(app);

messaging.onBackgroundMessage((payload) => {
  console.log("Notification payload: ", payload);

  return self.registration.showNotification(payload.data.name || "New Event", {
    body: payload.data.description || "",
  });
})
I have also added a handler for foreground notifications (that is when the application is in focus) that would create a toast -
useEffect(() => {
    import("../lib/firebase").then(({ messaging }) => {
      onMessage(messaging, payload => {
        toast.custom(t => <EventToast t={t} payload={payload} />);
      });
    });
  }, []);
I had to import messaging dynamically on the client-side here as it was getting imported on the server-side during building and was throwing errors.
I am using NextJS API routes for the backend of the application and any webhooks are posted to the events API routes, /api/events
Here is the code for handling events -
try {
    const apiKey = req.headers["x-api-key"] || req.query.apiKey;
    if (!apiKey) {
        return res.status(400).json({
            error: "Missing API key",
        });
    } else if (!(await ApiKey.exists({
            key: apiKey
        }))) {
        return res.status(400).json({
            error: "Invalid API key",
        });
    } else {
        const streamIdFormatted = new ObjectId(streamId as string);
        const body = req.body;
        if (typeof body === "object") {
            if (sizeof(body) <= 16384) {
                const event = new Event({
                    streamId: streamIdFormatted,
                    ...body,
                });

                event.save((err, event) => {
                    if (err) {
                        res.status(500).json({
                            error: err.message
                        });
                    } else {
                        res.status(200).json(event);
                    }
                });

                const stream = await Stream.findOne({
                    _id: streamIdFormatted,
                });

                const registrationTokens = await FCMToken.find({
                    ownerId: stream.ownerId,
                });

                if (registrationTokens.length > 0) {
                    messaging
                        .sendMulticast({
                            data: body,
                            tokens: registrationTokens.map(token => token.token),
                        })
                        .then(res => console.log(res));
                }
            } else {
                throw new Error("Body too large. Keep it under 16384 bytes");
            }
        } else {
            throw Error("Body must be an object (json)");
        }
    }
} catch (error) {
    res.status(400).json({
        error: error.message
    });
}
First of all, everything is wrapped in a try...catch block so that we return an error in case something goes wrong.
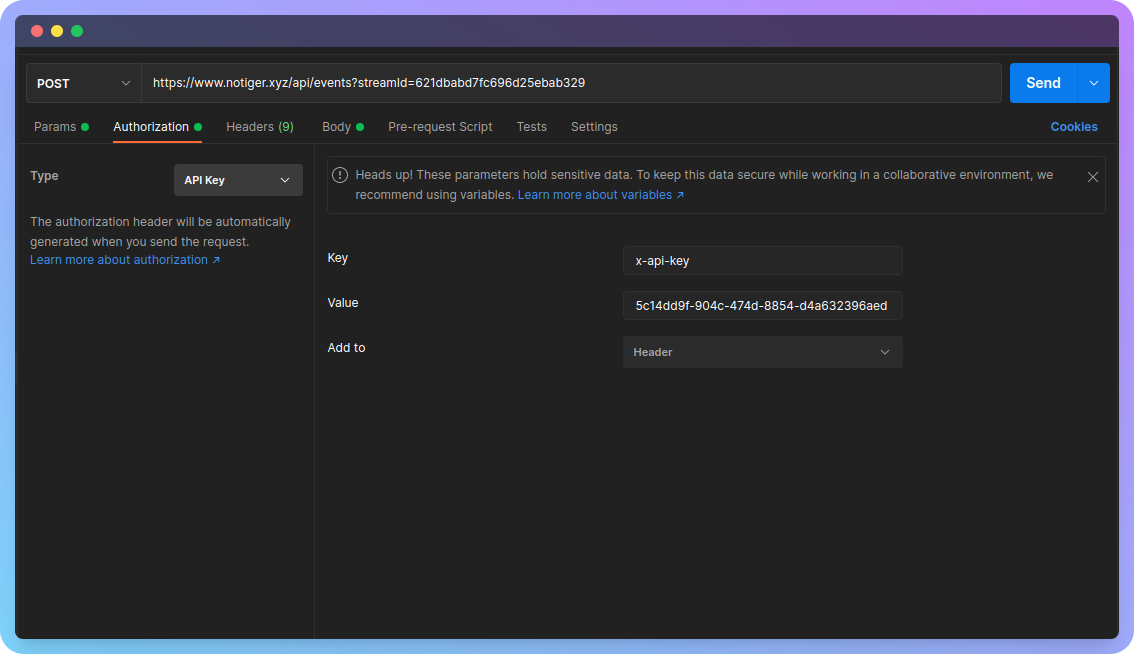
In the try block, we are looking for 2 parameters, the streamId and the apiKey. The streamId must be passed in as a query parameter to the application. The apiKey should be passed in as a the x-api-key header usually but in case it is not possible, it can also be passed in as a query parameter. Here is how the requests will look like -
With the API key passed in as a header -
curl --location --request POST 'https://www.notiger.xyz/api/events?streamId=<STREAM_ID>' \
--header 'x-api-key: <API_KEY>' \
--header 'Content-Type: application/json' \
--data-raw '{
    "name": "Test Event",
    "description": "Test Description",
    "icon": "🎇"
}'
With the API key as a query parameter -
curl --location --request POST 'https://www.notiger.xyz/api/events?streamId=<STREAM_ID>&apiKey=<API_KEY>' \
--header 'Content-Type: application/json' \
--data-raw '{
    "name": "Test Event",
    "description": "Test Description",
    "icon": "🎇"
}'
Do note that you can send this POST request from other programming languages as well. Like with JavaScript, for instance, you can use axios or with Python, you can use requests.
If the API key is valid, we save the event to the database, given that the event payload is under 16 kilobytes in size and is in the form of a JSON object. This is to prevent spam. Checks for streamId is done beforehand itself.
After saving the event to the database, we retrieve the stream associated with the event and then the Firebase Cloud Messaging registration tokens associated with the owner of the stream. This is needed to send the notifications to the devices with notifications enabled the user has. Next, we send the notification.
Whenever a webhook is fired, a payload is passed in as well. Notiger will accept all payloads under 16 kilobytes which are in the form of a JSON object. This payload usually contains more details about an event. For example, in the case of a build success event on Netlify, it contains information about the site, the time it was published, the deployed URL, the serverless functions deployed to AWS Lambda, and many more.
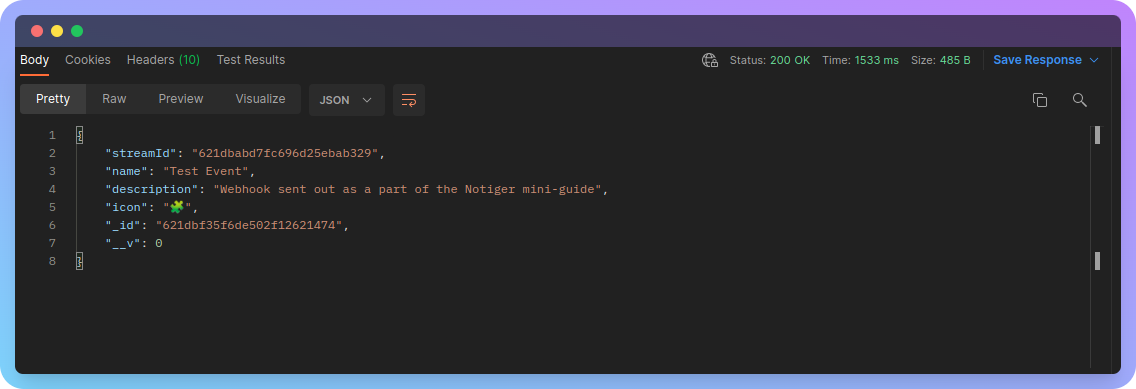
Notiger also adds an _id, __v and streamId field to each event. The _id field is the id of the event stored in MongoDB. In fact, the date it was created can also be retrieved from it.
Code to retrieve created timestamp of a MongoDB document -
const getCreatedAtFromMongoId = (mongoId: string): string => {
  return format(new Date(parseInt(mongoId.substring(0, 8), 16) * 1000), "PPpp");
};
I go over it in more detail in this tweet
The __v field is the version of the document and increments whenever it is updated. The streamId field is the id of the stream the event belongs to.
What are the applications where Notiger can be used?
I have already gone over the example of the contact form and Netlify build notifications. There are, however, many more use cases, some quite advanced -
As smart home devices and other IoT devices are getting more popular and common, one is looking for making better use of them. When a specific event occurs, like say when the temperature goes above 30°C in a lab environment, an event can be triggered that will push a notification to, say, the lab owner's phone so that they can take immediate action.
Many manufacturing tasks often take a long time and notifications can help here too. Say, there is a 3D print going on and as soon as it is done, the 3D printer can fire a webhook notifying the owner that the print is done. It can also be used in cases of mechanical failures etc.
Complex computational operations take a long time and, here as well, notifications can be fired in case of failures, successes, etc.
SaaS owners often want to get a real-time feed of the number of sign-ups, paid users, etc. on their applications. Notifications can be fired on events such as sign-ups, plan upgrades, bug reports, etc.
One of my goals with Notiger was to make it as easy to use as possible. Let us go through a mini-guide on how to use it
The first step is to sign up by clicking the login button at the top-right corner or visiting /auth. Here, you will be prompted to sign in with Google.
Next, head over to the dashboard page -
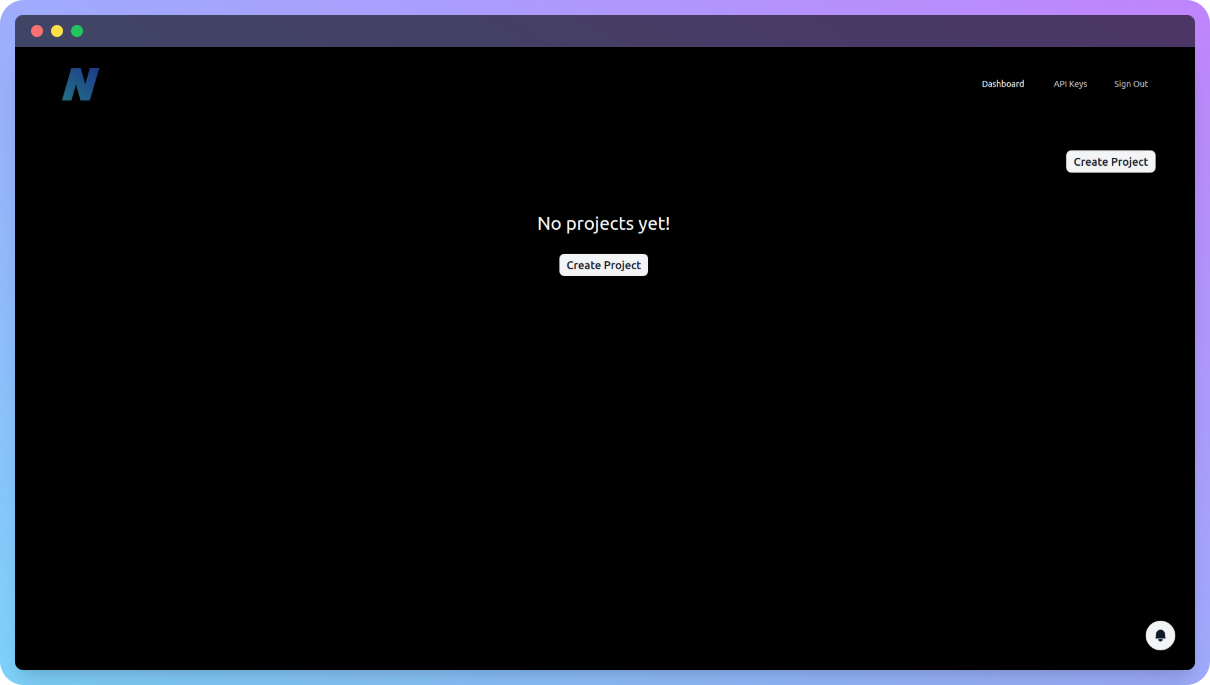
Next, create a project -

Click on the project and you should be taken to the project page. Here is how it should look like -
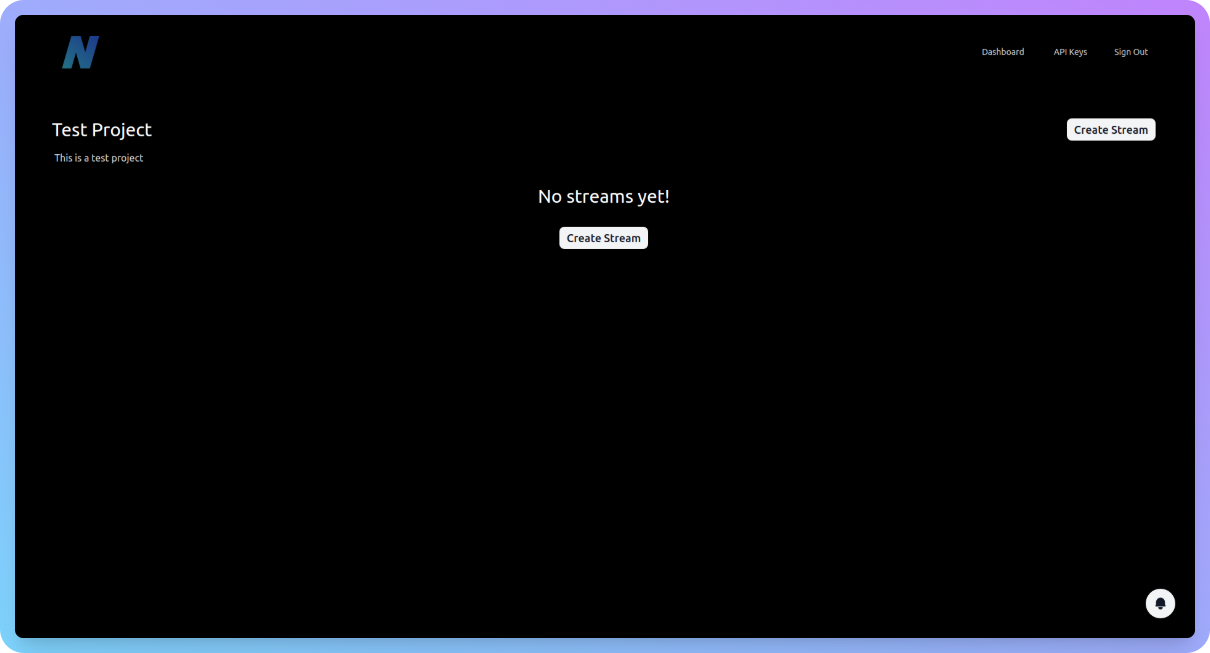
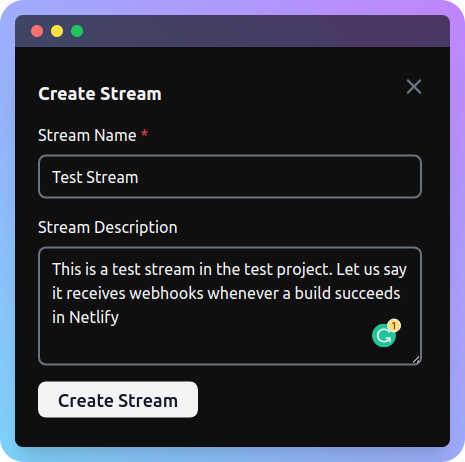
Now, let us create a stream -
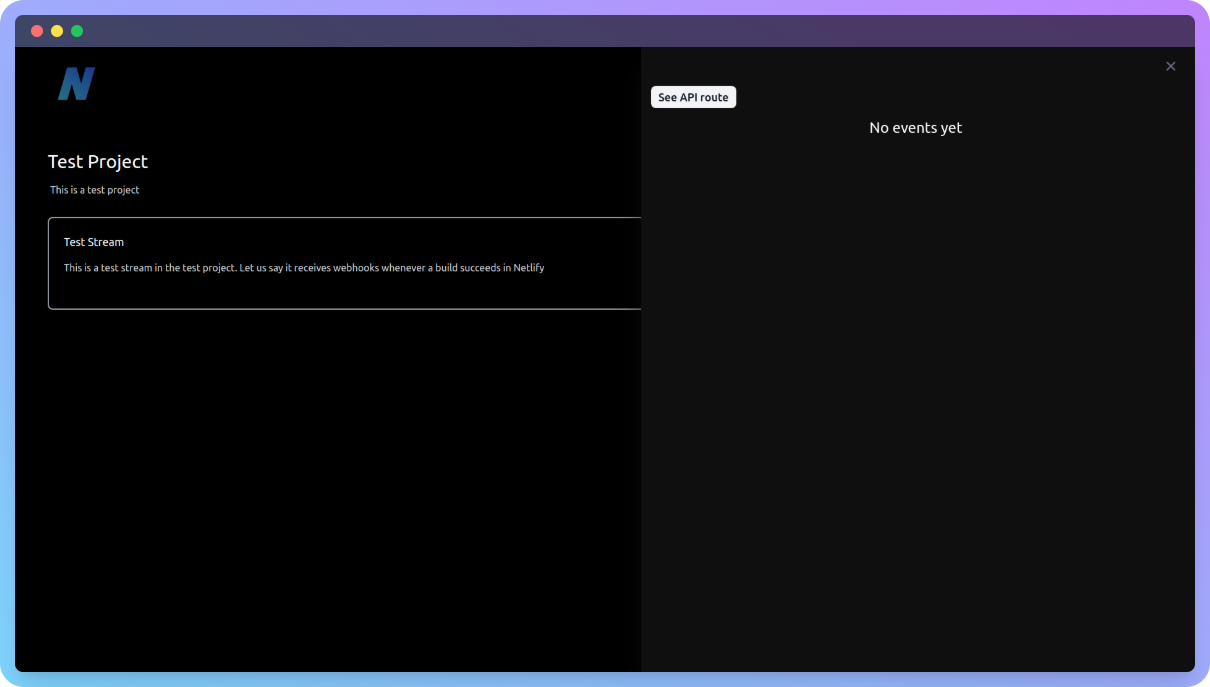
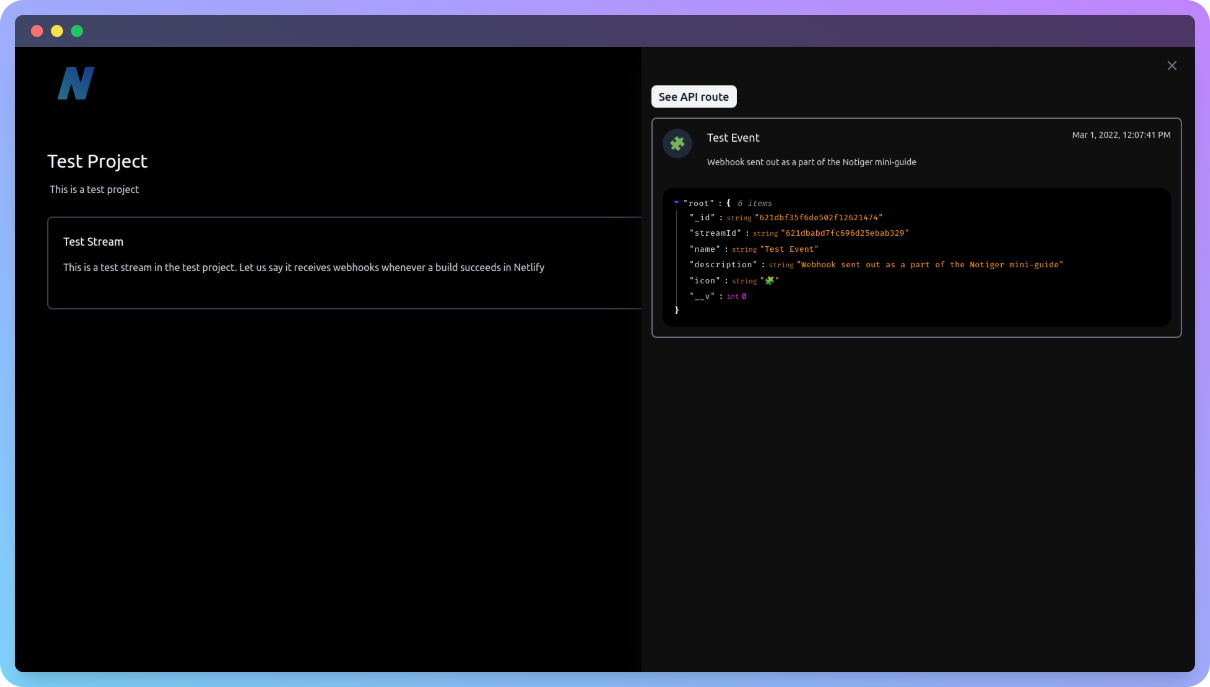
Upon clicking on the stream, we can see that there are no events yet -
We can see the API route by clicking on the button that says "See API Route" -
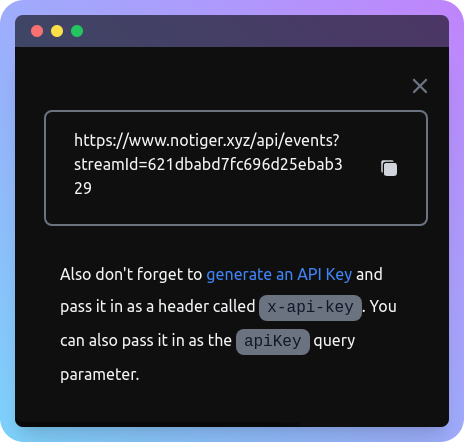
This will be used when sending webhook notifications.
Now that we have copied the URL, we can head over to generate an API Key -
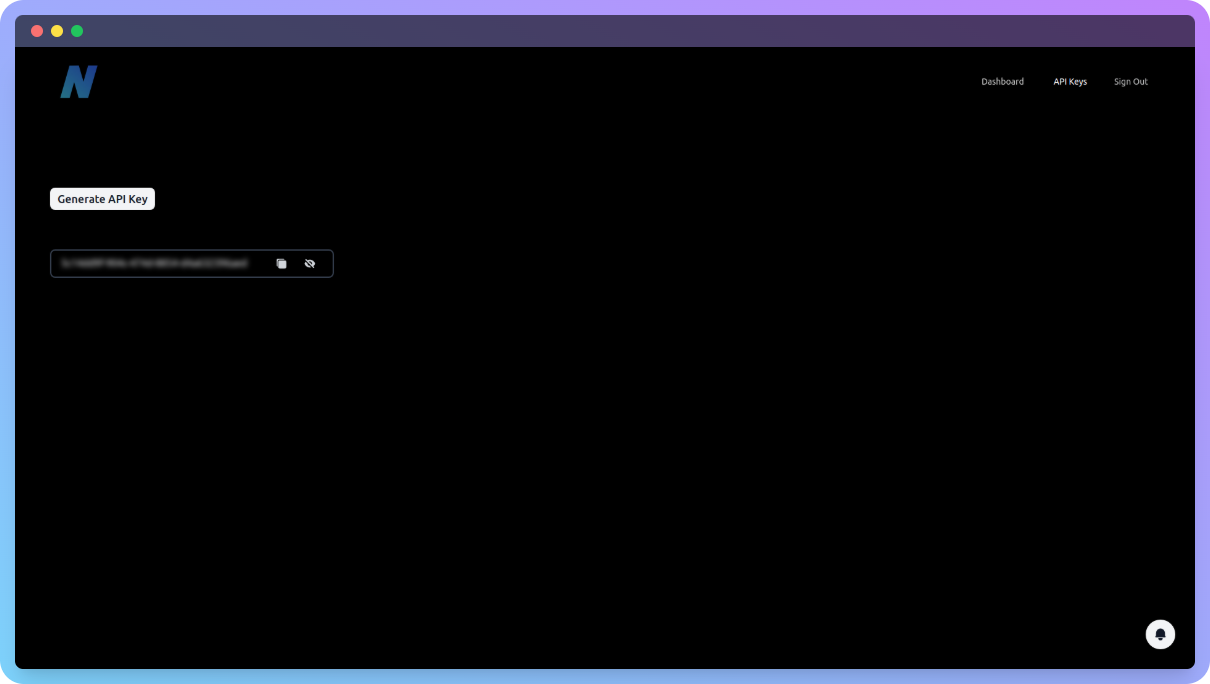
Copy this value as well.
For this example, I am going to be using Postman to send a webhook but in a real-world scenario, it will likely be sent from code or a shell script.
Here is how we do it from Postman -
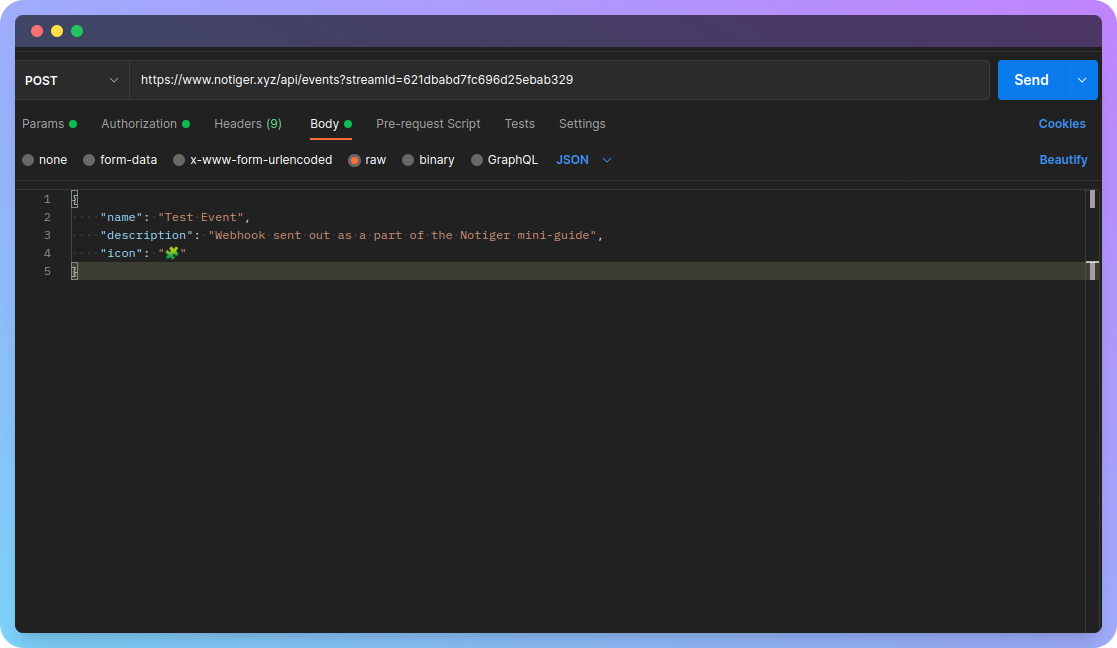
Also, don't forget to add a payload. It may look something like this -
Do note that you can pass in the API key as a query parameter called apiKey as well. Now click on "Send".
We will get back a response, somewhat like this -
Also, now if we check our stream in the Notiger projects dashboard, we will be able to see the event -
To enable notifications, click the bell on the bottom-right corner -

It had been an amazing journey building Notiger, squashing bugs, and writing this blog post! Can't wait to see how this side project does in the days to come!
Bye, and have a nice day 😁🤞